
Planting
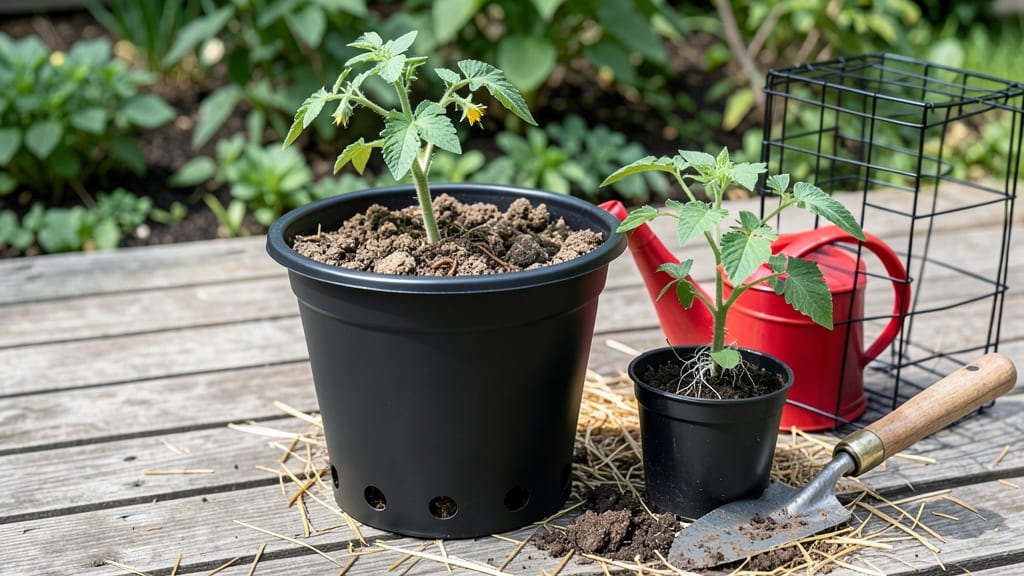
Planting tomato plants in a bucket lets you grow juicy vine-ripened tomatoes on a balcony or patio—no yard required. 🌱 I’ve grown cherry tomatoes, beefsteaks, and even paste varieties in 5-gallon buckets, and the key is matching the plant’s needs to the container’s size and drainage.
The right setup means fewer diseases, more fruit, and plants that thrive even in tight spaces.
Start with a 5-gallon bucket (or larger for indeterminate varieties) that has drainage holes—tomatoes hate soggy roots. Use a lightweight potting mix (not garden soil) mixed with compost for nutrients, and pick a determinate variety like ‘Tiny Tim’ for smaller buckets or ‘Sungold’ for prolific cherry tomatoes.
Plant deep: bury the stem halfway up the bucket to encourage strong roots.
Place your bucket in full sun (6+ hours daily) and water when the top inch of soil feels dry—buckets dry out faster than ground soil. A mulch layer of straw keeps moisture in, and a cage or stakes will support those heavy vines.
With consistent care, you’ll harvest 30-50% more tomatoes than store-bought plants, and the flavor? Unmatched.
Common mistakes? Overwatering (check soil first), skipping drainage (root rot is silent), or cramming plants in too-small containers. For extra yield, prune suckers and fertilize weekly with diluted tomato food. By mid-summer, your balcony will be a sun-ripened tomato paradise—no garden required.
📚 In This Guide
- What you need
- Instructions
- Tips and common mistakes
- Wrapping up and next steps
What you need
- ● Bucket: A 5-gallon plastic bucket with drainage holes (or a container at least 12" deep and wide). Avoid metal buckets, as they can overheat.
- ● Tomato plant: A healthy determinate or indeterminate tomato seedling or seed (choose varieties like 'Cherry Roma,' 'Sweet 100,' or 'Better Boy' for buckets).
- ● Potting mix: A high-quality, well-draining container mix (avoid garden soil—it compacts and drains poorly). Look for blends labeled for vegetables or tomatoes.
- ● Drainage material: Small rocks, pebbles, or broken pottery pieces (about 1-2 inches worth) to place at the bottom of the bucket.
- ● Fertilizer: A balanced, slow-release granular fertilizer (like 10-10-10) or an organic option such as compost or worm castings.
- ● Support: A tomato cage (3-4 feet tall) or stakes/bamboo poles (at least 3-5 feet long) to secure the plant as it grows.
- ● Watering can or hose: With a gentle spray nozzle for even watering.
- ● Mulch: Straw or shredded leaves to retain moisture and regulate soil temperature.
- ● Bucket saucer or tray: To catch excess water and prevent messes.
- ● Liquid fertilizer: For occasional feeding (like fish emulsion or seaweed extract).
- ● Bucket handles or straps: To easily move your tomato bucket if needed.
- ● Soil moisture meter: To check water levels without over-saturating the roots.
Step-by-Step instructions for planting tomato plants in buckets
Here's my foolproof method for growing thriving tomato plants in containers—perfect for small spaces.
🪴 Step 1: Choose the Right Bucket and Drainage
Select a 5-gallon bucket with at least four drainage holes near the bottom—tomatoes hate soggy roots. If your bucket lacks holes, drill them yourself using a ½-inch bit. Place a piece of hardware cloth over each hole to prevent soil from washing out while allowing water to escape freely.
I like to use black plastic buckets because they absorb heat, keeping roots warmer in cooler weather. If using a decorative container, ensure it's at least 12 inches deep—shallower buckets restrict root growth and reduce yield. The wider the bucket, the better for stability and plant support.
🌱 Step 2: Prepare the Growing Medium
Fill the bucket with a high-quality potting mix blended with 20% perlite or vermiculite for improved drainage. I avoid garden soil—it compacts in containers and suffocates roots. Mix in a slow-release fertilizer (like 10-10-10) at the rate of 1 tablespoon per gallon of soil.
Moisten the mix until it's evenly damp but not soggy—think of a wrung-out sponge. Press it down lightly to eliminate air pockets, then add a 2-inch layer of compost on top. This top layer provides nutrients while keeping the mix loose for root penetration.
☀️ Step 3: Plant Your Tomato with Proper Support
Dig a hole in the center of the bucket deep enough to bury the tomato plant up to its first set of leaves. Gently remove the plant from its nursery pot, loosen the roots, and place it in the hole. Fill around the roots with the prepared mix, pressing lightly to eliminate air gaps.
Install a sturdy tomato cage or bamboo stake immediately after planting—tomatoes grow fast, and waiting means struggling to add support later. I like 5-foot cages for determinate varieties and 6-foot stakes for indeterminate types. Secure the plant to the support with soft plant ties to prevent stem damage as it grows.
💧 Step 4: Water and Position for Success
Water the plant deeply until water runs freely from the drainage holes. This ensures roots establish quickly in the new environment. After the initial watering, maintain 1-2 inches of soil moisture—check by sticking your finger 1 inch deep. If it feels dry, water again.
Place your bucket in a location with full sun exposure (at least 6-8 hours daily). A south-facing balcony or patio works best. If you're in a hot climate, provide afternoon shade to prevent leaf scorch. Rotate the bucket a quarter turn weekly so the plant grows upright rather than leaning toward the light.
✂️ Step 5: Maintain Through the Season
Fertilize every 2-3 weeks with a balanced liquid fertilizer (like 5-5-5) mixed at half-strength. I also add 1 tablespoon of compost to the soil surface monthly to replenish nutrients. Prune suckers (the small shoots that form in the leaf axils) regularly to encourage stronger stem growth and better fruit production.
Watch for early signs of disease like yellowing leaves or spots—these often indicate overwatering or poor airflow. If you notice wilting in the afternoon heat, move the plant to a shadier spot temporarily. Harvest tomatoes when they're fully colored and slightly soft to the touch—this ensures peak flavor and encourages more production.
Tips & tricks for perfect tomato plants in buckets
Here's what nobody tells you about container gardening that'll make all the difference with your tomato plants.
Container Selection: For Step 1, don't overlook the importance of bucket material. While black plastic buckets absorb heat beautifully, consider fabric grow bags for better airflow to the roots. If using a decorative container, ensure it's at least 12 inches deep—shallower containers will stunt your plant's growth. I've seen tomato plants in 5-gallon buckets produce just as well as in 15-gallon containers, but only if you're growing dwarf varieties. The key is proper drainage and root space.
Soil Preparation: In Step 2, when blending your potting mix with perlite or vermiculite, aim for a ratio of 80% potting mix to 20% amendment. This balance provides the perfect mix of moisture retention and drainage. I like to add a handful of worm castings to the compost layer—this gives your plants a gentle nutrient boost right from planting. The worm castings also help improve soil structure for better root development.
Support System: For Step 3, if you're growing indeterminate varieties, consider using a combination of a 6-foot stake and a tomato cage for maximum support. The cage provides lateral support, while the stake helps keep the plant upright. I've found that securing the plant to the support with soft plant ties at three points—near the base, mid-stem, and top—prevents stem damage as the plant grows. This method also makes it easier to rotate the plant for even sun exposure.
Watering Wisdom: In Step 4, the 1-2 inch soil moisture guideline is perfect, but here's a pro tip: water in the morning so the foliage has time to dry before evening. This simple habit drastically reduces the risk of fungal diseases like blight. I use a watering can with a long spout to water directly at the soil level, avoiding wetting the leaves. This method also helps prevent soil erosion around the base of your plant.
Pro Tips for Plant A Tomato Plant In A Bucket
- Here's what nobody tells you about container gardening that'll make all the difference with your tomato plants.
- Container Selection: For Step 1, don't overlook the importance of bucket material. While black plastic buckets absorb...
- Soil Preparation: In Step 2, when blending your potting mix with perlite or vermiculite, aim for a ratio of 80% potti...
Frequently asked questions
Got questions about growing tomatoes in buckets? You’re not alone! Here are some of the most common concerns—and their solutions—to help you grow like a pro.
Can I reuse a bucket from last year’s tomatoes?
While you can reuse a bucket, it’s best to sterilize it first to prevent diseases like blight or fungal infections. Scrub with a 10% bleach solution (1 part bleach to 9 parts water), rinse thoroughly, and let it dry in the sun. Pro tip: Drill new drainage holes if old ones are clogged!
When is the best time to plant tomato seeds in a bucket?
Start seeds indoors 6–8 weeks before your last frost date (check your USDA zone). For transplanting seedlings, wait until nighttime temps stay above 50°F (10°C)—tomatoes are frost-sensitive! If you’re in a warm climate, you can direct-sow seeds in buckets anytime after soil warms (use a soil thermometer).
How often should I water tomato plants in buckets?
Buckets dry out fast—check soil moisture daily! Water when the top 1–2 inches feel dry, aiming for 1–1.5 gallons per plant per day during fruiting. Use a self-watering system or drip irrigation to keep moisture consistent. Morning watering prevents fungal issues from evening dampness.
Why are my bucket-grown tomatoes cracking?
Cracking usually means uneven watering—too much after a dry spell stresses the fruit. Keep soil consistently moist (not soggy) and mulch the bucket’s surface to retain humidity. Varieties like ‘Roma’ or ‘Celebrity’ are less prone to cracking. Harvest tomatoes when they’re firm but ripe to minimize splits!
What’s a good alternative to a 5-gallon bucket?
Any container with drainage holes and at least 3–5 gallons of space works! Try:
- Fabric grow bags (breathable, prevents root circling)
- Plastic barrels (durable, retains heat)
- Ceramic pots (aesthetic, but heavier)
- Recycled trash cans (line with a plastic liner for easy cleaning)
Just ensure the container is sturdy—tomatoes get heavy!
Wrapping up and next steps
Growing tomatoes in a bucket is a rewarding way to enjoy fresh, homegrown produce—even in small spaces! With the right setup, sunlight, water, and care, your plant can thrive and yield delicious fruit all season long.
Whether you’re a beginner or a seasoned gardener, this method proves that big flavors don’t need big gardens.
Now that you’re ready to plant, grab your bucket and get growing! 🌱 Next, check out our guide on how to care for your tomato plant to keep it happy and productive from seedling to harvest.