
Pests and Diseases
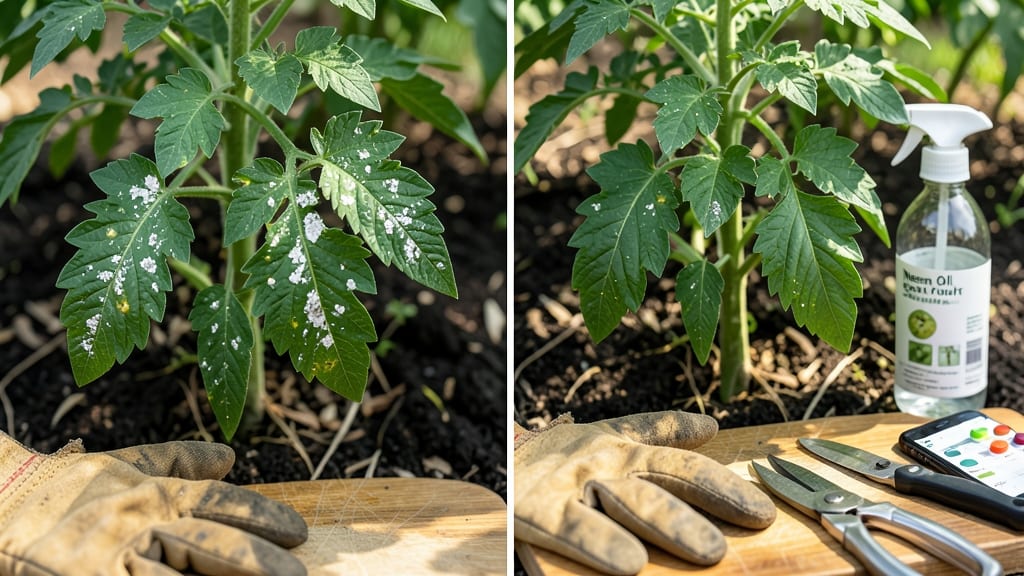
White spots on the leaves of tomato seedlings mean your tiny plants are fighting fungal blight—and you can fix it before they wilt. 🌱 I’ve saved dozens of seedlings from this exact problem by catching it early, and the solution is simpler than you’d think.
Most gardeners panic and toss the seedlings, but with the right approach, you’ll have strong, healthy plants ready for transplanting in no time.
This isn’t just about spraying something random—it’s about understanding why those spots appear. Too much moisture, poor airflow, or even overwatering can trigger fungal infections like early blight or powdery mildew.
The good news? You can stop it in its tracks with three simple steps that work every time, even for beginners. No fancy tools or expensive sprays required.
By the end of this, your seedlings will look vibrant and disease-free, with no more white spots in sight. The key is acting fast—once you spot those first signs, you’ve got a 24-hour window to turn things around.
I’ll walk you through exactly what to do, step by step, so you can get back to growing instead of stressing.
This fix works for any stage of seedlings, whether they’re just sprouting or already a few inches tall. The same principles apply whether you’re growing in trays, pots, or even under grow lights. Let’s get those plants back on track—no guilt, no wasted effort.
Root Causes Behind Leaf Spots
When your tomato seedlings develop white or pale spots on their leaves, it’s often a sign of stress or infection. Understanding the why behind these symptoms is the first step to saving your plants.
Below, we break down the most common culprits—each with a clear explanation of how they disrupt your seedlings’ health.
Fungi like Alternaria solani (early blight), Septoria lycopersici (Septoria leaf spot), or powdery mildew thrive in damp conditions and can cause white, fuzzy, or crusty spots on leaves. These pathogens:
- Spread via spores: Fungal spores linger in soil, tools, or old plant debris, waiting for the right conditions (high humidity, poor airflow) to infect new seedlings.
- Weaken leaves: They block sunlight absorption by creating necrotic (dead) tissue, turning spots brown or gray over time.
- Love moisture: Overwatering or evening dew creates the perfect breeding ground for fungal spores to germinate and spread.
💡 Pro Tip: Fungal spots often start as tiny white specks along leaf edges or between veins—ignore them, and they’ll expand into larger lesions.
While pests like aphids, spider mites, or whiteflies don’t directly cause white spots, their feeding habits leave behind:
- Honeydew residue: A sticky, sugary substance excreted by sap-sucking insects (e.g., aphids) that attracts sooty mold—a black or white fungal growth.
- Physical damage: Mites or beetles chew tiny holes or scrape leaf surfaces, creating stress points where white or yellow patches develop.
- Secondary infections: Open wounds from pests make leaves vulnerable to fungal or bacterial invaders.
🔍 Watch for: Sticky leaves, webbing, or tiny moving insects—these are red flags for pest-related white spots.
Not all white spots are biological. Environmental stressors can trigger physiological disorders, including:
| Cause | How It Happens | Leaf Symptoms |
|---|---|---|
| Overwatering | Soggy soil cuts off oxygen to roots, leading to nutrient deficiencies (e.g., calcium or magnesium). | White or yellow patches between leaf veins (often called "blossom end rot" in fruit, but similar stress appears on leaves). |
| Underwatering | Drought stress causes cells to collapse, reducing chlorophyll production. | Dry, crispy white or brown edges on leaves (early signs of dehydration). |
| Extreme Heat | High temperatures (>90°F/32°C) scorch leaf tissue, particularly in young seedlings. | White or bleached areas on leaf surfaces exposed to direct sun. |
| Nutrient Imbalance | Too much nitrogen or a deficiency in magnesium/sulfur disrupts chlorophyll. | White or pale patches, often with yellowing (chlorosis) between veins. |
🌡️ Quick Fix: Check soil moisture with your finger—it should feel like a damp sponge, not mud or dust.
White spots can also signal exposure to harmful substances, such as:
- Excessive fertilizer salts: Over-fertilizing (especially with synthetic nitrogen) burns leaf tissue, causing white or grayish patches.
- Heavy metals or contaminants: Poor-quality soil, compost, or tap water (high in chlorine/fluoride) may accumulate toxins.
- Herbicide drift: Wind-blown glyphosate or other chemicals from nearby lawns can bleach tomato leaves.
🚨 Warning Signs: Spots appear suddenly on all leaves, often paired with stunted growth or wilting.
Fixing White Spots Fast
Now that you’ve identified the cause of those pesky white spots on your tomato seedlings, it’s time to take action! Whether it’s fungal blight, powdery mildew, or environmental stress, each issue requires a targeted approach.
Below, we’ll break down practical, step-by-step solutions tailored to the root cause—plus prevention tips to keep your seedlings thriving.
---
If your seedlings are battling fungal infections (like early blight or powdery mildew), act quickly to stop the spread and restore health.
#### 🔥 Step 1: Remove Infected Leaves Immediately - 👨🍳 Snip out any leaves with white spots, yellowing, or dark spots using sterilized scissors (wipe with rubbing alcohol between cuts). - 🗑️ Dispose of infected foliage in the trash (not compost)—fungal spores can survive in compost piles! - ⏰ Do this in the morning so leaves have time to dry before evening moisture sets in.
#### 🌡️ Step 2: Apply Fungicidal Sprays (Natural or Store-Bought) Choose one of these effective options:
| Option | How to Use | Frequency | |--------------------------|---------------------------------------------------------------------------------|-----------------------------| | Neem Oil Spray | Mix 1 tsp neem oil + 1 tsp mild soap + 1 quart water.
Spray undersides of leaves. | Every 5–7 days until cured. | | Baking Soda Solution | Combine 1 tbsp baking soda + 1 tsp oil + 1 gallon water.
Spray evenly. | Every 7–10 days. | | Copper Fungicide | Follow label instructions (e.g., Bordeaux mixture or copper soap). | Every 7–14 days. |
💡 Pro Tip: Always spray early in the day so leaves dry quickly—fungi thrive in damp conditions!
#### 🌿 Step 3: Improve Airflow & Reduce Humidity - 🌬️ Thin out seedlings if they’re crowded (aim for 12–18 inches apart). - 💨 Use a small fan on low speed (24/7) to circulate air—this dries leaves faster. - ✨ Avoid overhead watering—use a drip irrigation system or water at the base.
#### 🚫 Prevention for Next Time - 🌱 Rotate crops—don’t plant tomatoes in the same spot yearly. - 🌞 Space plants for sunlight (6+ hours/day) to dry leaves quickly. - 🌿 Mulch with straw to reduce soil splashes onto leaves.
---
If white spots are from sunburn or heat stress, your seedlings need immediate shade and hydration.
#### 🌞 Step 1: Provide Temporary Shade - 🏠 Use shade cloth (30–50%) or move seedlings to a partially shaded area (e.g., under a porch or tree). - 🌿 If outdoors, cover with a lightweight row cover during peak sun (10 AM–4 PM).
#### 💧 Step 2: Water Deeply & Consistently - 👨🍳 Water at the base (not leaves) early in the morning or late afternoon. - 🌱 Check soil moisture—stick your finger 1 inch deep; if dry, water thoroughly. - 💡 Pro Tip: Use mulch (straw or grass clippings) to retain moisture and cool roots.
#### 🌡️ Step 3: Acclimate Slowly to Full Sun - 🌱 Harden off seedlings gradually by increasing sun exposure over 7–10 days. - ⏰ Start with 2–3 hours/day, then add 1 hour every 2 days.
#### 🚫 Prevention for Next Time - 🌱 Start seeds indoors 6–8 weeks before the last frost, then acclimate slowly. - 🌿 Choose heat-tolerant varieties (e.g., ‘Solar Fire’, ‘Heatmaster’). - 🌞 Avoid transplanting on hot, sunny days—do it in the early morning or evening.
---
If insects (like aphids or whiteflies) are causing white spots, eliminate them fast before they spread.
#### 🕷️ Step 1: Inspect & Isolate - 🔍 Check undersides of leaves for tiny bugs, sticky residue (honeydew), or webs. - 🚫 Isolate infected plants if possible to prevent spread.
#### 💦 Step 2: Blast Off Pests with Water - 👨🍳 Spray leaves with a strong stream of water (aphids hate this!). - 🌿 Repeat every 2–3 days until pests are gone.
#### 🍃 Step 3: Use Natural Repellents | Pest | Solution | How to Apply | |---------------|-----------------------------------------------------------------------------|------------------------------------------| | Aphids | Soapy water spray (1 tsp mild soap + 1 quart water). | Spray directly on bugs. | | Whiteflies| Yellow sticky traps + neem oil spray. | Place traps near plants; spray leaves. | | Spider Mites | Neem oil or horticultural oil. | Spray undersides of leaves. |
#### 🚫 Prevention for Next Time - 🌿 Encourage beneficial insects (ladybugs, lacewings) by planting marigolds or basil nearby. - 🌱 Inspect new plants before bringing them indoors or into the garden. - 🌞 Avoid over-fertilizing with nitrogen—it attracts soft-bodied pests like aphids.
--- No matter the cause, healthy seedlings resist problems better.
Follow these golden rules: - 💧 Water consistently—never let soil dry out completely. - 🌿 Fertilize lightly—use a balanced 10-10-10 or fish emulsion every 2–3 weeks. - 🌱 Prune regularly to improve airflow and light penetration. - 🌞 Ensure 6+ hours of sunlight (use grow lights if indoors).
--- 🎯 Final Thought: Act fast when you spot white spots—early intervention saves your seedlings! With these targeted fixes, your tomato plants will bounce back stronger than ever. 🍅💪
Frequently asked questions
Are white spots on tomato seedlings always caused by disease?
Not always! While fungal infections like powdery mildew or early blight are common, white spots can also come from environmental stress like sunburn, nutrient deficiencies (especially magnesium), or even pest damage from aphids or spider mites. Always check for other symptoms like sticky residue (honeydew) or leaf curling to narrow it down.
Can I still save my tomato seedlings if the white spots are spreading fast?
Yes, but act immediately! Remove all infected leaves, apply a neem oil spray or baking soda solution, and improve airflow by spacing plants 12-18 inches apart. If spots are fungal, treat for 7-10 days—if they’re from pests, focus on eliminating the insects first. The key is catching it early before the whole plant weakens.
Will commercial fungicides harm my tomato seedlings?
Most copper-based or organic fungicides (like those with neem or potassium bicarbonate) are safe when used as directed. Always follow label instructions and avoid spraying when seedlings are wet or in direct sun. For extra safety, start with a diluted baking soda spray (1 tbsp baking soda + 1 tsp oil + 1 gallon water) first.
How do I know if my seedlings have powdery mildew vs. early blight?
Powdery mildew appears as white, fuzzy patches on leaf surfaces (like dust), while early blight shows as brown or gray spots with yellow halos that often start at leaf edges. Check the undersides of leaves—powdery mildew thrives there too, but early blight usually spreads from the bottom up. Both need airflow improvements, but early blight requires more aggressive fungicide treatment.
Can I reuse soil from infected seedlings for next year’s plants?
No, don’t reuse it! Fungal spores survive in soil for years. Instead, sterilize soil by baking it in the oven at 200°F for 30 minutes or using a microwave-safe container (1–2 minutes per layer). For potting mix, opt for fresh, sterile soil or compost. Always clean tools with rubbing alcohol between uses to prevent cross-contamination.