
How To
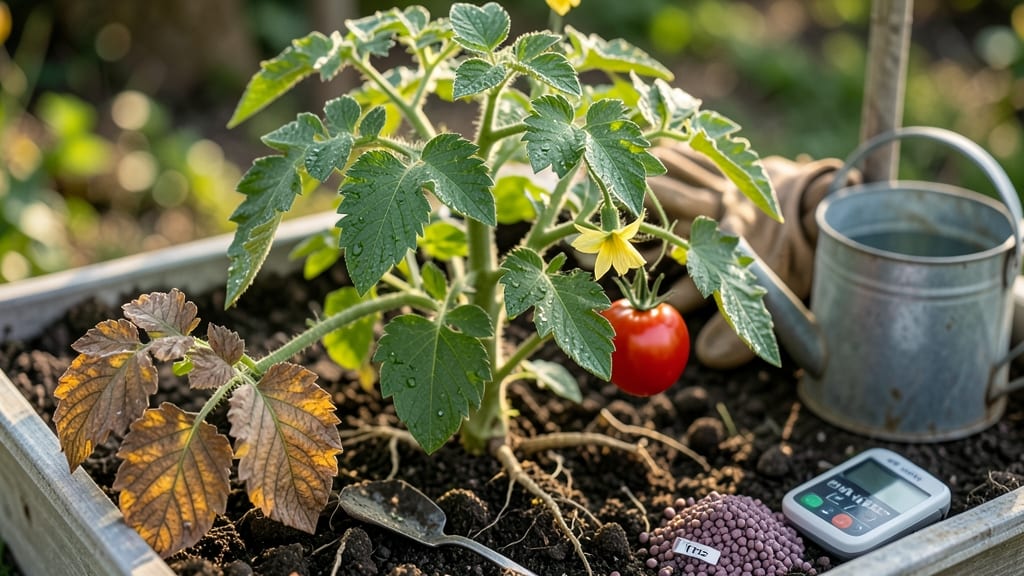
When the tips of tomato leaves are turning brown, it’s your plant’s way of signaling a deeper need than just hydration. 🌿 The problem usually starts with inconsistent moisture, but it can also mean your soil's too salty, the air's too dry, or nutrients are out of balance.
I've seen this happen after a heatwave or when gardeners switch from drip irrigation to overhead watering—suddenly, those edges curl and crisp like autumn leaves. The good news? This isn't a death sentence—just your plants' way of saying "slow down."
Start by checking your watering routine: deep, consistent soaking (about 1 inch per week) beats light sprinkles. If your soil feels gritty or crusty, it might need a flush with plain water to wash away salt buildup.
For container plants, try moving them to a shadier spot during peak afternoon sun. Within 3-5 days, you should see new growth with soft, healthy edges. The key is catching it early—once the damage spreads beyond the tips, the plant starts losing energy.
Prune only the most affected leaves to redirect resources to new growth, and consider a balanced fertilizer if the soil looks pale or plants seem stunted. This fix works for both garden beds and pots, and it's especially critical during summer's dry spells.
The moment you see those crispy edges soften, you'll know you've hit the right balance—no more guesswork, just thriving plants.
Root Causes Behind Brown Leaf Tips
When the delicate tips of your tomato leaves start turning brown, it’s often a silent SOS from your plant. Understanding the why behind this issue is the first step to saving your harvest.
Below, we break down the most common culprits—backed by science—and explain how they trigger those crispy, unsightly edges.
Tomatoes thrive on consistency, but too much love (in the form of water) can drown their roots. When soil stays soggy for too long, oxygen is squeezed out, and roots suffocate.
This stress forces the plant to transpire (release excess water) through its leaves, leading to edge burn as moisture evaporates faster than the plant can absorb it.
- Signs: Yellowing between leaf veins, mushy stems, or a foul odor from the soil.
- Science: Excess water disrupts nutrient uptake (like calcium and magnesium), causing physiological leaf scorch.
- Fix: Let the top 1–2 inches of soil dry out between waterings. Use well-draining soil mixes with perlite or sand.
Tomatoes are sun-worshippers, but intense midday heat (especially above 90°F/32°C) or direct, unfiltered sunlight can scorch leaves. The tips dry out because the plant’s stomata (tiny pores) close to conserve water, trapping moisture inside the leaf. When it finally escapes, it evaporates too quickly, leaving behind crispy, brown edges.
- Signs: Brown tips on upper leaves facing the sun, wilting during peak heat.
- Science: High temperatures increase transpiration rates while reducing root water absorption—a double whammy for leaf edges.
- Fix:
- Provide afternoon shade (use shade cloth or dappled sunlight).
- Mulch heavily to keep roots cool.
- Avoid overhead watering during heatwaves (water early morning instead).
Tomatoes hail from tropical climates, so low humidity (common in dry indoor or arid outdoor settings) forces them to work overtime to retain moisture. The leaf tips, being the most exposed, dry out first. This is especially true in heated homes or greenhouses without humidity control.
- Signs: Brown tips on all leaves, not just sun-exposed ones; crispy texture to the touch.
- Science: Low humidity increases cuticular transpiration (water loss through the leaf surface), dehydrating edges faster than roots can replenish.
- Fix:
- Use a humidifier near plants (aim for 40–60% humidity).
- Group tomato plants together to create a microclimate.
- Mist leaves lightly in the morning (avoid evening to prevent fungal issues).
While nutrients fuel growth, excessive salts (from tap water, synthetic fertilizers, or compost tea) or improper pH levels can block roots from absorbing water and minerals. This causes osmotic stress, where the plant’s cells lose water to the surrounding salty soil, leading to brown, brittle tips.
- Signs: Brown tips with white crust on soil surface; stunted growth despite frequent watering.
- Science: High salt concentrations lower the soil’s water potential, making it harder for roots to pull moisture upward.
- Fix:
- Flush soil with rainwater or distilled water to leach out salts.
- Test soil pH (ideal: 6.0–6.8) and amend with sulfur (to lower pH) or lime (to raise it).
- Switch to organic fertilizers (like compost or fish emulsion) and dilute synthetic fertilizers to half-strength.
While less common than environmental causes, pathogens like early blight or bacterial spot can mimic brown leaf tips. These diseases thrive in wet, humid conditions and clog stomata, preventing proper gas exchange and moisture regulation.
- Signs: Brown tips with dark spots or lesions; yellow halos around edges; slimy texture (bacterial infection).
- Science: Fungi/bacteria disrupt the cuticle layer, increasing water loss and nutrient leakage.
- Fix:
- Remove and destroy infected leaves immediately.
- Apply copper fungicide or neem oil preventatively.
- Improve airflow with pruning and spacing.
💡 Pro Tip: Keep a plant journal to track when brown tips appear. Note watering schedules, weather changes, and fertilizer use—this helps pinpoint the exact trigger for your tomato’s distress!
Fixing Brown Leaf Tips Fast
Now that you know what’s causing those unsightly brown tips on your tomato leaves, let’s roll up our sleeves and get them back to healthy green! The good news? Most issues have simple, effective fixes—no advanced horticulture degree required.
Below, we’ve mapped out practical solutions for each common cause, along with prevention tips to keep your plants thriving long-term.
---
Signs: Crispy, brown edges (often with yellowing underneath) or a wilted, droopy appearance.
#### 🔥 Fix It: Master the Watering Balance 1. Check the Soil First - Stick your finger 1–2 inches deep into the soil. If it’s damp but not soggy, hold off on watering.
If it’s bone-dry, it’s time to hydrate. - Pro Tip: Use a moisture meter for accuracy—no more guessing!
2. Water Deeply, Not Frequently - Deep watering (1–2 inches per session) encourages roots to grow deeper, making plants more drought-resistant. - Morning is best—watering early gives leaves time to dry, reducing fungal risks.
3. Improve Drainage - If your pots lack drainage holes, add them or switch to self-watering containers. - Mix in perlite or sand (20%) to sandy or clay-heavy soil to prevent compaction.
#### 🌱 Prevention Tips - Mulch around plants with straw or shredded leaves to retain moisture without over-saturating soil. - Group plants together to create a microclimate that reduces evaporation. - Avoid wetting leaves when watering—use a soaker hose or drip irrigation instead.
---
Signs: Brown, papery edges (often on older leaves) or scorched spots, especially in hot afternoons.
#### 🍳 Create Shade Strategically 1. Use Temporary Shade Cloth - If temps hit above 90°F (32°C), drape 30–50% shade cloth over plants for a few hours daily. - Quick Fix: Prop up a white sheet or old bedsheet on stakes for instant relief.
2. Adjust Plant Placement - Move pots to a spot with dappled shade (e.g., under a tree or pergola) during peak sun (11 AM–3 PM). - East-facing windows are ideal for indoor tomato plants.
3. Boost Humidity Naturally - Place a tray of water near plants or mist leaves early in the day (avoid evenings to prevent fungus). - Group plants together to increase ambient moisture.
#### 🌡️ Prevention Tips - Hardening off seedlings gradually before transplanting to toughen them up. - Choose heat-tolerant varieties like ‘Heatmaster’ or ‘Solar Fire’ if you live in a hot climate. - Water deeply before sunrise to help plants withstand afternoon heat.
---
Signs: Brown tips with black spots, mold, or webbing, or chewed edges from pests.
#### 👨🍳 Treat Fungal Problems 1. Prune and Remove Affected Leaves - Snip off brown or spotted leaves with sterilized scissors (wipe with rubbing alcohol). - Don’t compost them—toss in the trash to prevent spreading.
2. Apply Fungicide - Baking soda spray: Mix 1 tsp baking soda + 1 quart water + a few drops of dish soap. Spray every 7–10 days. - Neem oil (2 tsp per gallon of water) for powdery mildew or early blight.
3. Improve Airflow - Space plants 18–24 inches apart (or prune to open up the canopy). - Use a small fan on low setting for 5–10 minutes daily to reduce humidity around leaves.
#### 🔪 Pest Control 1. Handpick or Spray Off Pests - Aphids/spider mites: Blast off with water from a hose or wipe leaves with a soapy sponge (1 tsp mild soap per gallon of water). - Slugs/snails: Set up beer traps (bury a cup filled with beer) or use diatomaceous earth around the base.
2. Encourage Beneficial Insects - Plant marigolds, basil, or dill nearby to attract ladybugs and lacewings, which eat pests.
#### ✨ Prevention Tips - Water at the base (not overhead) to keep leaves dry. - Rotate crops yearly to prevent soil-borne fungi from building up. - Clean tools after pruning to avoid spreading disease.
---
Signs: Brown, crinkled tips (often with purple stems or slow growth).
#### 📊 Fix with the Right Fertilizer 1. Test Your Soil - Use a DIY soil test kit (or send a sample to a local extension office) to check pH and nutrient levels. - Tomatoes thrive in slightly acidic soil (pH 6.0–6.8).
2. Use a Balanced Tomato Fertilizer - Compost or worm castings: Mix 1 cup per plant into the soil at planting. - Liquid feed: Use a 5-5-5 or 10-10-10 fertilizer (equal parts nitrogen, phosphorus, potassium) every 2–3 weeks. - Quick Fix: Banana peel tea (steep peels in water for 24 hours) for potassium, which strengthens leaves.
3. Avoid Over-Fertilizing - Too much nitrogen = lush leaves, fewer tomatoes. Stick to phosphorus-heavy fertilizers (like bone meal) when flowers appear.
#### 💪 Prevention Tips - Side-dress plants with compost mid-season for a slow-release nutrient boost. - Avoid fresh manure—it can burn roots. Use aged compost instead. - Mulch with grass clippings (nitrogen-rich) or straw (carbon-rich) for balanced soil.
---
1. Trim the Damage - Snip off only the brown tips (not whole leaves) to let the plant focus on new growth.
2. Monitor and Adjust - Keep a plant journal to track watering, sunlight, and fertilizer changes—what worked (or didn’t).
3. Be Patient - Healthy new leaves should emerge in 1–2 weeks if the root cause is addressed.
--- Final Thought: Brown tips are often a cry for help—but with these fixes, your tomato plants will bounce back faster than you think! 🌱🍅
Frequently asked questions
Why do tomato leaves get brown tips even when I water them daily?
Overwatering or poor drainage can actually cause brown tips by suffocating roots. Check if your soil stays soggy—tomatoes prefer the top 1–2 inches to dry slightly between waterings. Also, ensure pots have drainage holes and consider adding perlite to improve airflow in the soil.
Can I save tomato plants with severely browned leaves?
Yes, but act fast! Prune only the most damaged tips (never whole leaves) to redirect energy. If roots are healthy, new growth should appear in 1–2 weeks. For advanced cases, check for fungal issues—remove affected leaves immediately and apply neem oil to prevent spread.
Is it safe to use tap water for tomato plants?
Tap water can cause brown tips if it's high in chlorine, salts, or minerals. Use rainwater or distilled water when possible. If you must use tap water, let it sit out for 24 hours to dissipate chlorine first. For container plants, flush soil monthly with plain water to prevent salt buildup.
How do I tell if brown tips are from heat or disease?
Heat damage usually appears as crispy, dry edges on upper leaves exposed to direct sun, while disease often shows dark spots, yellow halos, or slimy textures. Check for other symptoms: fungal issues spread quickly in humid conditions, while heat stress occurs during hot afternoons.
Will Epsom salt fix brown tips caused by nutrient deficiency?
Epsom salt (magnesium sulfate) can help if deficiency is the issue, but it's not a cure-all. Mix 1 tablespoon per gallon of water and apply monthly. For better results, test your soil's pH (6.0–6.8 is ideal) and use a balanced tomato fertilizer with equal parts nitrogen, phosphorus, and potassium.