
Planting
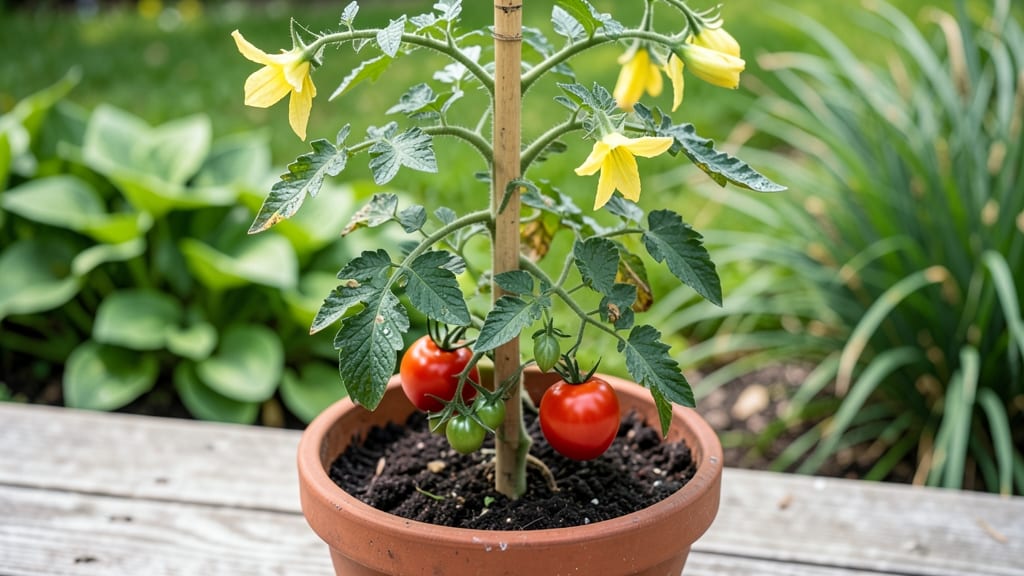
Growing patio tomato plants in containers can deliver heirloom-quality tomatoes even on a tiny balcony. 🌱 I’ve grown cherry tomatoes in 5-gallon pots that produced more fruit than my in-ground plants—proof that space isn’t the limiting factor, technique is.
The right heat-resistant variety, proper sunlight, and consistent care turn a patio into a productive harvest zone.
Start with determinate varieties like 'Patio Princess' or 'Tiny Tim' for compact growth, or indeterminate heat lovers like 'Solar Fire' if you want continuous harvests. A 5-gallon container per plant (minimum) ensures roots stay hydrated, while black fabric pots help regulate soil temperature.
Mix in compost and perlite for drainage, and place containers where they’ll get 6+ hours of direct sun daily—morning sun is ideal in hot climates.
Water deeply every 2-3 days (check soil moisture before watering), and prune suckers to focus energy on fruit production. Stake plants early to prevent sprawl, and use mulch to retain moisture. Within 6-8 weeks, you’ll see blossoms, and by mid-summer, you’ll be harvesting tomatoes that outshine store-bought varieties.
The key? Consistency—tomatoes reward patience with flavor and yield that surprise even seasoned gardeners.
This method works for balconies, rooftops, or small yards—no backyard required. Adapt by choosing dwarf varieties for tighter spaces or larger containers for bigger plants. The only challenge is keeping up with the harvest, not the growing. Ready to turn your patio into a tomato powerhouse?
📚 In This Guide
- What you need
- Instructions
- Tips and common mistakes
- Wrapping up and next steps
What you need
- ● Patio tomato plants (heat-resistant varieties): 1–3 plants (e.g., 'Heatmaster,' 'Solar Fire,' or 'Sun Gold'). Choose compact or determinate types for small spaces.
- ● Growing containers: 5-gallon pots (minimum) or larger (10+ gallons for bigger varieties). Ensure they have drainage holes.
- ● High-quality potting mix: 2–3 bags (sterile, well-draining mix with added compost or worm castings). Avoid garden soil.
- ● Tomato cages or stakes: 1–2 sturdy cages (5–6 ft tall) or bamboo stakes + soft ties per plant for support.
- ● Slow-release fertilizer: 1–2 tablets or granules (12–14 hour release) or organic options like fish emulsion or compost tea.
- ● Mulch: Straw, shredded leaves, or wood chips (1–2 inches thick) to retain moisture and regulate soil temp.
- ● Hand trowel or small shovel for planting.
- ● Watering can or hose with a gentle nozzle (avoid overhead watering to prevent disease).
- ● Pruning shears for trimming suckers and dead leaves.
- ○ pH test kit (optional) to check soil acidity (ideal: 6.0–6.8).
- ○ Shade cloth (optional) for seedlings if temps exceed 90°F.
- ● Garden gloves to protect your hands.
- ● A sunny spot receiving 6–8+ hours of direct sunlight daily (patio, balcony, or deck).
- ● Access to water (tomatoes need 1–2 inches per week, more in heatwaves).
- ● Patience! Tomatoes take 60–90 days to fruit, depending on the variety.
Step-by-Step guide to growing heat-resistant patio tomatoes
Here's how to transform your small patio into a productive tomato haven using varieties that thrive in summer heat.
🪴 Step 1: Select the Right Containers and Heat-Tolerant Varieties
Choose 5-gallon fabric grow bags or plastic pots with at least 18-inch depth—tomatoes need room for strong root systems. I always opt for heat-resistant varieties like 'Solar Fire', 'Heatmaster', or 'Celebrity' because they produce fruit even when temperatures climb above 90°F. These varieties also handle partial shade better than traditional types.
Fill containers with sterile potting mix (never garden soil—it compacts and suffocates roots). Mix in 1 cup of compost and 1 tablespoon of balanced fertilizer (10-10-10) per pot. The goal is loose, well-draining soil that holds moisture without becoming waterlogged. Tap the pot gently after filling to eliminate air pockets while keeping the mix light.
☀️ Step 2: Position for Maximum Sun and Heat Management
Place your patio tomatoes in a spot that gets 6-8 hours of direct sun, but avoid full afternoon sun in extreme heat. I position mine on a west-facing patio where they receive morning sun and afternoon shade from nearby structures. If you must use full sun, provide afternoon shade cloth during heatwaves to prevent sunscald on fruit.
Use light-colored containers to reflect heat rather than absorb it. Dark pots can raise soil temperatures by 20°F or more, stressing plants. Elevate pots on brick stands to improve airflow around the base—this prevents soil from overheating and encourages stronger root growth. Watch for wilting leaves in afternoon heat—this is normal if the soil stays moist.
💧 Step 3: Water Deeply and Strategically for Heat Resistance
Water early in the morning (before 9 AM) to allow foliage to dry completely by evening—wet leaves in hot conditions invite fungal diseases. Use 1-2 gallons per plant each watering, applied directly to the soil. I avoid overhead watering entirely once plants are established. Let the top 2 inches of soil dry between waterings to encourage deep root growth.
Mulch with 2 inches of straw to retain moisture and keep roots cool. The mulch also prevents soil from splashing onto leaves during watering. You'll notice stronger stems and darker green leaves when moisture management is right—these are signs your plants are thriving despite the heat.
✂️ Step 4: Prune and Support for Heat Stress Prevention
Install sturdy cages or stakes immediately after transplanting—tomatoes grow fast in heat, and wind can snap weak stems. Prune suckers (the small shoots in leaf axils) regularly to direct energy into fruit production rather than foliage. Remove any leaves touching the ground to prevent soil-borne diseases from spreading upward.
When temperatures exceed 95°F, provide light shade cloth during peak afternoon heat. You'll see blossom drop (flowers falling off) in extreme heat—this is normal and not a sign of failure. Focus on keeping roots cool and soil consistently moist. Once temperatures dip below 85°F, remove shade cloth to maximize fruit set.
🍅 Step 5: Harvest and Maintain Through the Season
Harvest tomatoes when they're fully colored and slightly soft to touch. Heat-resistant varieties often ripen faster in summer conditions. Pick regularly to encourage more production—overripe fruit on the vine attracts pests and diseases. I harvest every 2-3 days during peak season to keep plants productive.
Fertilize every 4-6 weeks with liquid tomato fertilizer (5-10-10) to replenish nutrients lost through heavy fruiting. Stop fertilizing 4-6 weeks before first frost to allow plants to harden off naturally. You'll know your tomatoes are ready for fall when leaves start yellowing—this is their signal to prepare for dormancy.
Tips & tricks for growing thriving patio tomatoes
Transforming your patio into a productive tomato garden doesn't have to be complicated—these pro tips will help you maximize your harvest while keeping plants happy in the heat.
Container Selection: If you're limited to space, consider using stackable fabric grow bags—they're lightweight and allow for better airflow around roots. For deeper-rooted varieties, add a second 5-gallon bag beneath the first to create a 10-gallon system. This extra depth gives tomatoes room to develop stronger root systems that can better withstand heat stress. Remember, deeper containers also mean you'll need to water less frequently since moisture stays closer to the roots.
Soil Preparation: The key to heat resistance starts with soil. After mixing in your 1 cup of compost and 1 tablespoon of balanced fertilizer, add a handful of perlite or vermiculite to improve aeration—this prevents soil from becoming compacted and suffocating roots. I also recommend adding a slow-release fertilizer like Osmoote at planting time to provide steady nutrients throughout the season without overfeeding. This is especially important in containers where nutrients leach out quickly.
Heat Management: When temperatures climb above 95°F, focus on cooling the roots rather than the leaves. Soak the pots in a tub of water for 10-15 minutes during extreme heat—this mimics natural rainfall and helps regulate soil temperature. You'll notice a significant difference in plant vigor after just one session. For afternoon shade, use 30-50% shade cloth rather than complete coverage; tomatoes still need plenty of light to produce fruit. The goal is to reduce leaf temperature by 10-15°F, not eliminate sunlight entirely.
Pruning Strategy: In Step 4, when you're pruning suckers, save a few of the smallest ones near the base of the plant. These can be trained to grow along the ground as "rooting suckers"—if you gently bury them in soil, they'll develop their own roots, creating a stronger, more resilient plant. This is particularly useful for heat-resistant varieties that tend to get leggy. Just be sure to remove any leaves that touch the soil to prevent disease.
Pro Tips for Patio Tomato Plant
- Transforming your patio into a productive tomato garden doesn't have to be complicated—these pro tips will help you m...
- Container Selection: If you're limited to space, consider using stackable fabric grow bags—they're lightweight and al...
- Soil Preparation: The key to heat resistance starts with soil. After mixing in your 1 cup of compost and 1 tablespoon...
Frequently asked questions
Got questions about growing patio tomato plants? You’re not alone! Here are answers to the most common queries to help you cultivate a thriving harvest—even in small spaces.
What are the best patio tomato varieties for small spaces?
Look for determinate varieties like ‘Tiny Tim,’ ‘Patio Princess,’ or ‘Balcony Red’—they’re compact, bushy, and perfect for containers. Indeterminate types (e.g., ‘Sungold’) need staking but produce prolifically. Choose based on your space and sun exposure!
How long does it take for patio tomatoes to produce fruit?
With proper care, expect first fruits in 60–85 days for early varieties (like ‘Tumbling Tom’) or 70–100 days for heirlooms. Warmth and consistent watering speed up ripening—just be patient!
How often should I water my patio tomato plant?
Water deeply 1–2 times weekly (more in heatwaves), ensuring soil stays consistently moist but not soggy. Containers dry out faster—check the top inch daily. Morning watering prevents fungal issues. Mulch helps retain moisture!
What pests commonly attack patio tomatoes, and how do I prevent them?
Watch for aphids, hornworms, and whiteflies. Use neem oil or insecticidal soap for mild infestations. Row covers deter pests early, and companion planting (basil, marigolds) deters bugs naturally. Prune damaged leaves promptly!
Can I grow patio tomatoes in partial shade?
Tomatoes need 6–8 hours of direct sun daily for best fruit production. In partial shade (<4 hours sun), opt for shade-tolerant varieties like ‘Solar Fire’ or ‘Black Cherry.’ Expect smaller yields—supplement with grow lights if indoors!
What can I do if my patio tomato plant’s leaves turn yellow?
Yellow leaves often signal overwatering, underwatering, or nutrient deficiency. Check soil moisture and adjust watering. Fertilize with tomato-specific feed (high in potassium/phosphorus) every 2–3 weeks. If lower leaves yellow first, it’s usually normal aging!
Wrapping up and next steps
Growing patio tomato plants is a rewarding way to enjoy fresh, homegrown tomatoes—even in small spaces! With the right heat-resistant varieties and a little care, you’ll soon be harvesting juicy, flavorful fruit for salads, sauces, and sandwiches.
Start by choosing a sunny spot, providing sturdy support, and keeping your plants well-watered and fed.
Ready to dive in? Pick your favorite variety, gather your supplies, and get planting! Whether you’re a beginner or a seasoned gardener, your patio tomato adventure is just one seed away from delicious success. Happy growing! 🌱🍅