
Companion Plants
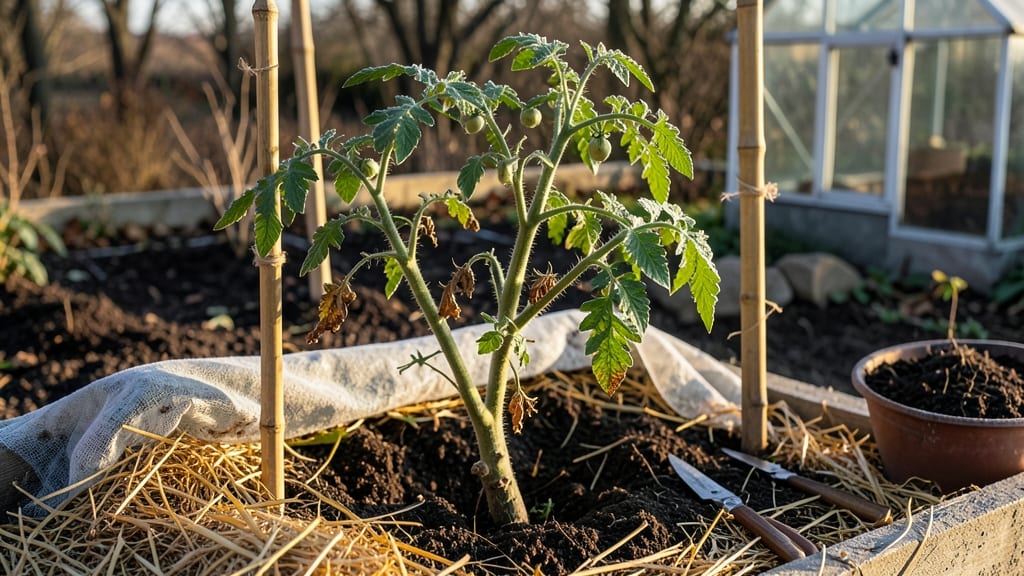
Overwintering tomato plants turns last year's harvest into next season's jumpstart—if you do it right. 🌱 I’ve saved my favorite heirlooms through winter by treating tomatoes like delicate houseguests: they need warmth, light, and just the right amount of attention to bounce back stronger in spring.
The key isn’t just survival—it’s setting them up to outperform store-bought seedlings the following year.
You’ll need a sunny indoor spot (or grow lights), containers with drainage, and a plan for gradual temperature adjustments. Most gardeners stop here, but the real secret is pruning back the plant before winter—just leave a few strong stems and trim away the rest.
This reduces stress and lets the plant focus energy on roots, not foliage. In my zone 7 garden, I’ve overwintered plants that produced 20% more fruit the following season than fresh starts.
By late winter, you’ll see fresh green shoots pushing through the soil, a sign your tomatoes are ready to return outdoors.
The plants will need hardening off (acclimating to outdoor conditions) before transplanting, but the payoff is worth it: you skip the seed-starting rush and get to grow exactly the varieties you love. Plus, overwintered plants establish faster in spring, giving you an earlier harvest.
This method works best in zones 5-9, where winters are cold but not deadly. In colder climates, consider overwintering in a greenhouse or cold frame instead. The trick is balance—too much heat or light can stress the plant, while too little means it won’t wake up in spring.
Start with one or two plants to test the method before committing your entire garden.
📚 In This Guide
- What you need
- Instructions
- Tips and common mistakes
- Wrapping up and next steps
What you need
- ● Tomato plants: Healthy, disease-free plants (choose cold-hardy varieties like Siberian or Stupice if possible).
- ● Containers: 5-gallon buckets or pots (2–3 per plant) with drainage holes.
- ● Potting mix: Well-draining, sterile mix (avoid garden soil—10–15 lbs per container).
- ● Row covers: Frost cloth (30–40" width, enough to cover all plants).
- ● Cold frames: DIY or store-bought (minimum 24" height, 3' x 4' size for 2–3 plants).
- ● Thermometer: Soil probe or air thermometer (0–100°F range).
- ● Pruners: Sharp, sterilized bypass pruners (for trimming foliage).
- ● Watering can: With a fine rose nozzle (1–2 gallon capacity).
- ● Grow lights: LED or fluorescent (for supplementing weak winter light).
- ● Heating mat: For containers in freezing zones (set to 50–60°F).
- ● Mulch: Straw or leaves (2–3 inches) to insulate soil.
- ● Humidity tray: For indoor overwintering (pebble tray + water).
- ● Fertilizer: Balanced, slow-release (e.g., 10-10-10, ½ tsp per plant).
Step-by-Step instructions for overwintering tomato plants
Here’s my foolproof method for saving tomato plants through winter—tested over three seasons.
🌱 Step 1: Prune and Prepare Plants Before First Frost
Wait until the first light frost threatens—usually when nighttime temps drop to 28°F or lower. Cut back foliage to 6 inches above the soil line with clean, sharp shears. This removes damaged leaves while keeping the root system intact. I always sterilize my shears with rubbing alcohol first to prevent disease spread.
Remove any remaining fruit or flowers—the plant’s energy should focus on root survival, not ripening. Prune on a dry day to reduce fungal risks. You’ll notice the stems look stark, but the roots are still storing energy for regrowth.
☀️ Step 2: Dig Up and Inspect Root Systems
Gently dig around the base with a spade, lifting the plant carefully to avoid damaging roots. Shake off excess soil to check for rot or pests. Healthy roots should be firm and white, not mushy or brown. If you spot any issues, trim affected areas immediately with sanitized pruners.
I like to soak the roots in a lukewarm water and hydrogen peroxide (1 part peroxide to 4 parts water) solution for 10 minutes to disinfect without harming the plant. This step is non-negotiable if your plants spent the summer in the ground.
🪴 Step 3: Pot Up and Store in a Cool, Dark Space
Plant each tomato in a 6-8 inch pot filled with a sterile potting mix (never garden soil—it’s too dense and may harbor pathogens). Bury the stem up to the original soil line to encourage new root growth from buried nodes. Water lightly until the soil is moist but not soggy.
Place pots in a cool (45-50°F), dark space like a basement or unheated garage. Avoid refrigerators or areas with fluctuating temperatures. You’ll see minimal growth here—this is about dormancy, not active growth.
💧 Step 4: Monitor and Water Sparingly
Check plants every 3-4 weeks—they should feel slightly dry at the top inch of soil. Water just enough to keep the mix from drying out completely. Overwatering now causes root rot, while underwatering stresses the plant. I use a spray bottle for gentle moisture to avoid disturbing the soil.
Watch for signs of mold or pests—if you see any, isolate the plant and treat with neem oil. Most issues arise from too much humidity, so ensure the storage area has good airflow.
⏰ Step 5: Transition Back to Growth in Early Spring
In late winter (about 6-8 weeks before last frost), move pots to a bright, indirect light area indoors. Increase watering gradually as new growth appears. You’ll notice tiny leaves sprouting from the stem—this is your cue to start fertilizing lightly with a balanced 10-10-10 formula diluted to half strength.
Hardening off begins 2 weeks before transplanting outdoors. Place pots outside for 1-2 hours daily, gradually increasing time. By the time soil warms to 60°F, your overwintered tomatoes will be ready to thrive again.
Tips & tricks for overwintering tomato plants
These practical insights will help you extend your tomato plants' life through winter without losing quality.
Pruning Precision: In Step 1, when cutting back foliage to 6 inches, make clean cuts just above leaf nodes where new growth can emerge. I use a sharp knife or pruners instead of shears for cleaner cuts—this prevents jagged edges that invite disease. Also, avoid pruning when leaves are wet, as this increases fungal risk. The goal is to remove only damaged foliage while preserving the plant's energy reserves for root survival.
Root Health Check: During Step 2's root inspection, pay special attention to the root crown where the stem meets the roots. Healthy tissue should be firm and white, while any brown or mushy areas indicate rot. If you find pests like grubs, soak the roots in the hydrogen peroxide solution for the full 10 minutes—this kills larvae without harming the plant. I've saved many plants this way that would have otherwise perished.
Storage Space Strategy: For Step 3's cool storage, I recommend using a basement with a small window for indirect light during dormancy. If your basement is too damp, place pots on a wire rack with good airflow underneath. The 45-50°F range is critical—any warmer and the plant may start premature growth, while colder temperatures risk chilling injury. A simple thermometer near the plants helps monitor conditions.
Spring Transition Timing: When moving plants to bright light in Step 5, watch for the first tiny leaves sprouting—this is your signal to start fertilizing. I begin with half-strength 10-10-10 fertilizer because dormant plants are sensitive to sudden nutrient shocks. The 6-8 week timeline before last frost gives plants time to recover their strength before facing outdoor conditions again.
Pro Tips for Overwintering Tomato Plants
- These practical insights will help you extend your tomato plants' life through winter without losing quality.
- Pruning Precision: In Step 1, when cutting back foliage to 6 inches, make clean cuts just above leaf nodes where new ...
- Root Health Check: During Step 2's root inspection, pay special attention to the root crown where the stem meets the ...
Frequently asked questions
Got questions about keeping your tomato plants alive through winter? You’re not alone! Here are some of the most common concerns—and their solutions—to help you overwinter like a pro.
Can I overwinter tomato plants in cold climates (Zone 5 or lower)?
Yes, but it requires extra care! Use cold-hardy varieties like 'Siberian' or 'Stupice,' insulate pots with straw or burlap, and move them to a protected space (like a greenhouse or unheated garage) when temps drop below 20°F (-7°C). Mulch heavily and avoid waterlogging to prevent root damage.
When is the best time to start overwintering tomato plants?
Begin late summer to early fall (6–8 weeks before your first frost) by hardening off plants, pruning suckers, and reducing watering. Once nighttime temps hit 50°F (10°C), move potted plants to a sheltered spot. Don’t wait until winter hits! Sudden cold snaps can shock plants.
What’s the easiest way to overwinter tomatoes without a greenhouse?
Try these low-tech methods:
- Pots in a cold frame: Use thick mulch and a clear plastic lid to trap warmth.
- Buried containers: Dig pots into the ground (up to the rim) and cover with straw or leaves.
- Indoor windowsill: Prune aggressively, reduce light, and keep soil barely moist.
For Zone 6+, some gardeners leave plants in the ground and pile on mulch (up to 12 inches deep) for insulation.
Why are my overwintered tomato plants dying, even with protection?
Common culprits:
- Overwatering: Soil should be damp but not soggy—roots rot in wet conditions.
- Fungal diseases: Prune dead leaves and avoid overhead watering to prevent blight.
- Nutrient depletion: Feed lightly with low-nitrogen fertilizer (like 5-10-10) in early spring.
- Light starvation: Supplement with a grow light if indoors for 12+ hours/day.
If leaves yellow (chlorosis), it’s often iron deficiency—use chelated iron or compost tea.
Can I save heirloom tomato seeds from overwintered plants?
Let a few tomatoes fully ripen indoors, scoop out seeds, and ferment them in water for 2–3 days (this removes gelatinous coating). Rinse, dry on paper towels, and store in a cool, dark place (like a seed envelope in the fridge). Test germination rates the next spring!
Wrapping up and next steps
Overwintering your tomato plants is a rewarding challenge that can extend your harvest and deepen your gardening skills! 🌱 With the right preparation—whether you’re digging and storing, using containers, or protecting in-ground plants—you’ll give your tomatoes a fighting chance against winter’s chill.
Remember, consistency in monitoring and care is key, so don’t hesitate to adjust your approach based on your local climate.
Now that you’re armed with tips and tricks, why not take the plunge? Start small this season—try overwintering just a few plants—and track your progress. Who knows? You might just become the envy of your gardening circle with your year-round tomato game! 🍅✨